Training Machine Learning models for the iOS App
So far in the series of articles we have learned how to build artificially intelligent features using already pre-trained Machine Learning models - either via domain-specific frameworks or by downloading and using machine learning models from the internet. Very often this functionality covers developer’s needs, however to fulfill more specific requirements and empower the collected data, training models ourselfs is the way to go.
In this article reader will get knowledge of how to use tools for creating and Training custom Machine Learning models.
For simplicity, a very primitive example is used across the article - we will train a sound classifier model that can recognize and distinguish two sound categories: dogs barking and cats meowing. The dataset used for training the model can be downloaded from the Kaggle website.
Without any further ado, let’s jump into training the sound classifier machine learning model with Create ML.
Training Machine Learning Sound Classifier model with Create ML
Create ML provides two ways of training the models - via the Create ML Application with an intuitive user interface and via code. Although we developers like to write code, I encourage you to use Create ML application instead of writing training scripts yourself using the CreateML framework in Xcode Playgrounds. The Create ML application provides almost as much flexibility as you’d get by writing code. Additionally, Create ML application draws informative training accuracy graphs, allows testing models manually, and much more. Most likely you’ll end up using other tools like Turi Create than using Create ML in playgrounds if the desired result cannot be achieved with Create ML application. Ok, let’s train our first Machine Learning model!
Type in Create ML into the finder and open the application. Then start a new project by selecting File -> New Project. A window presenting a bunch of training templates should appear on your Mac screen:
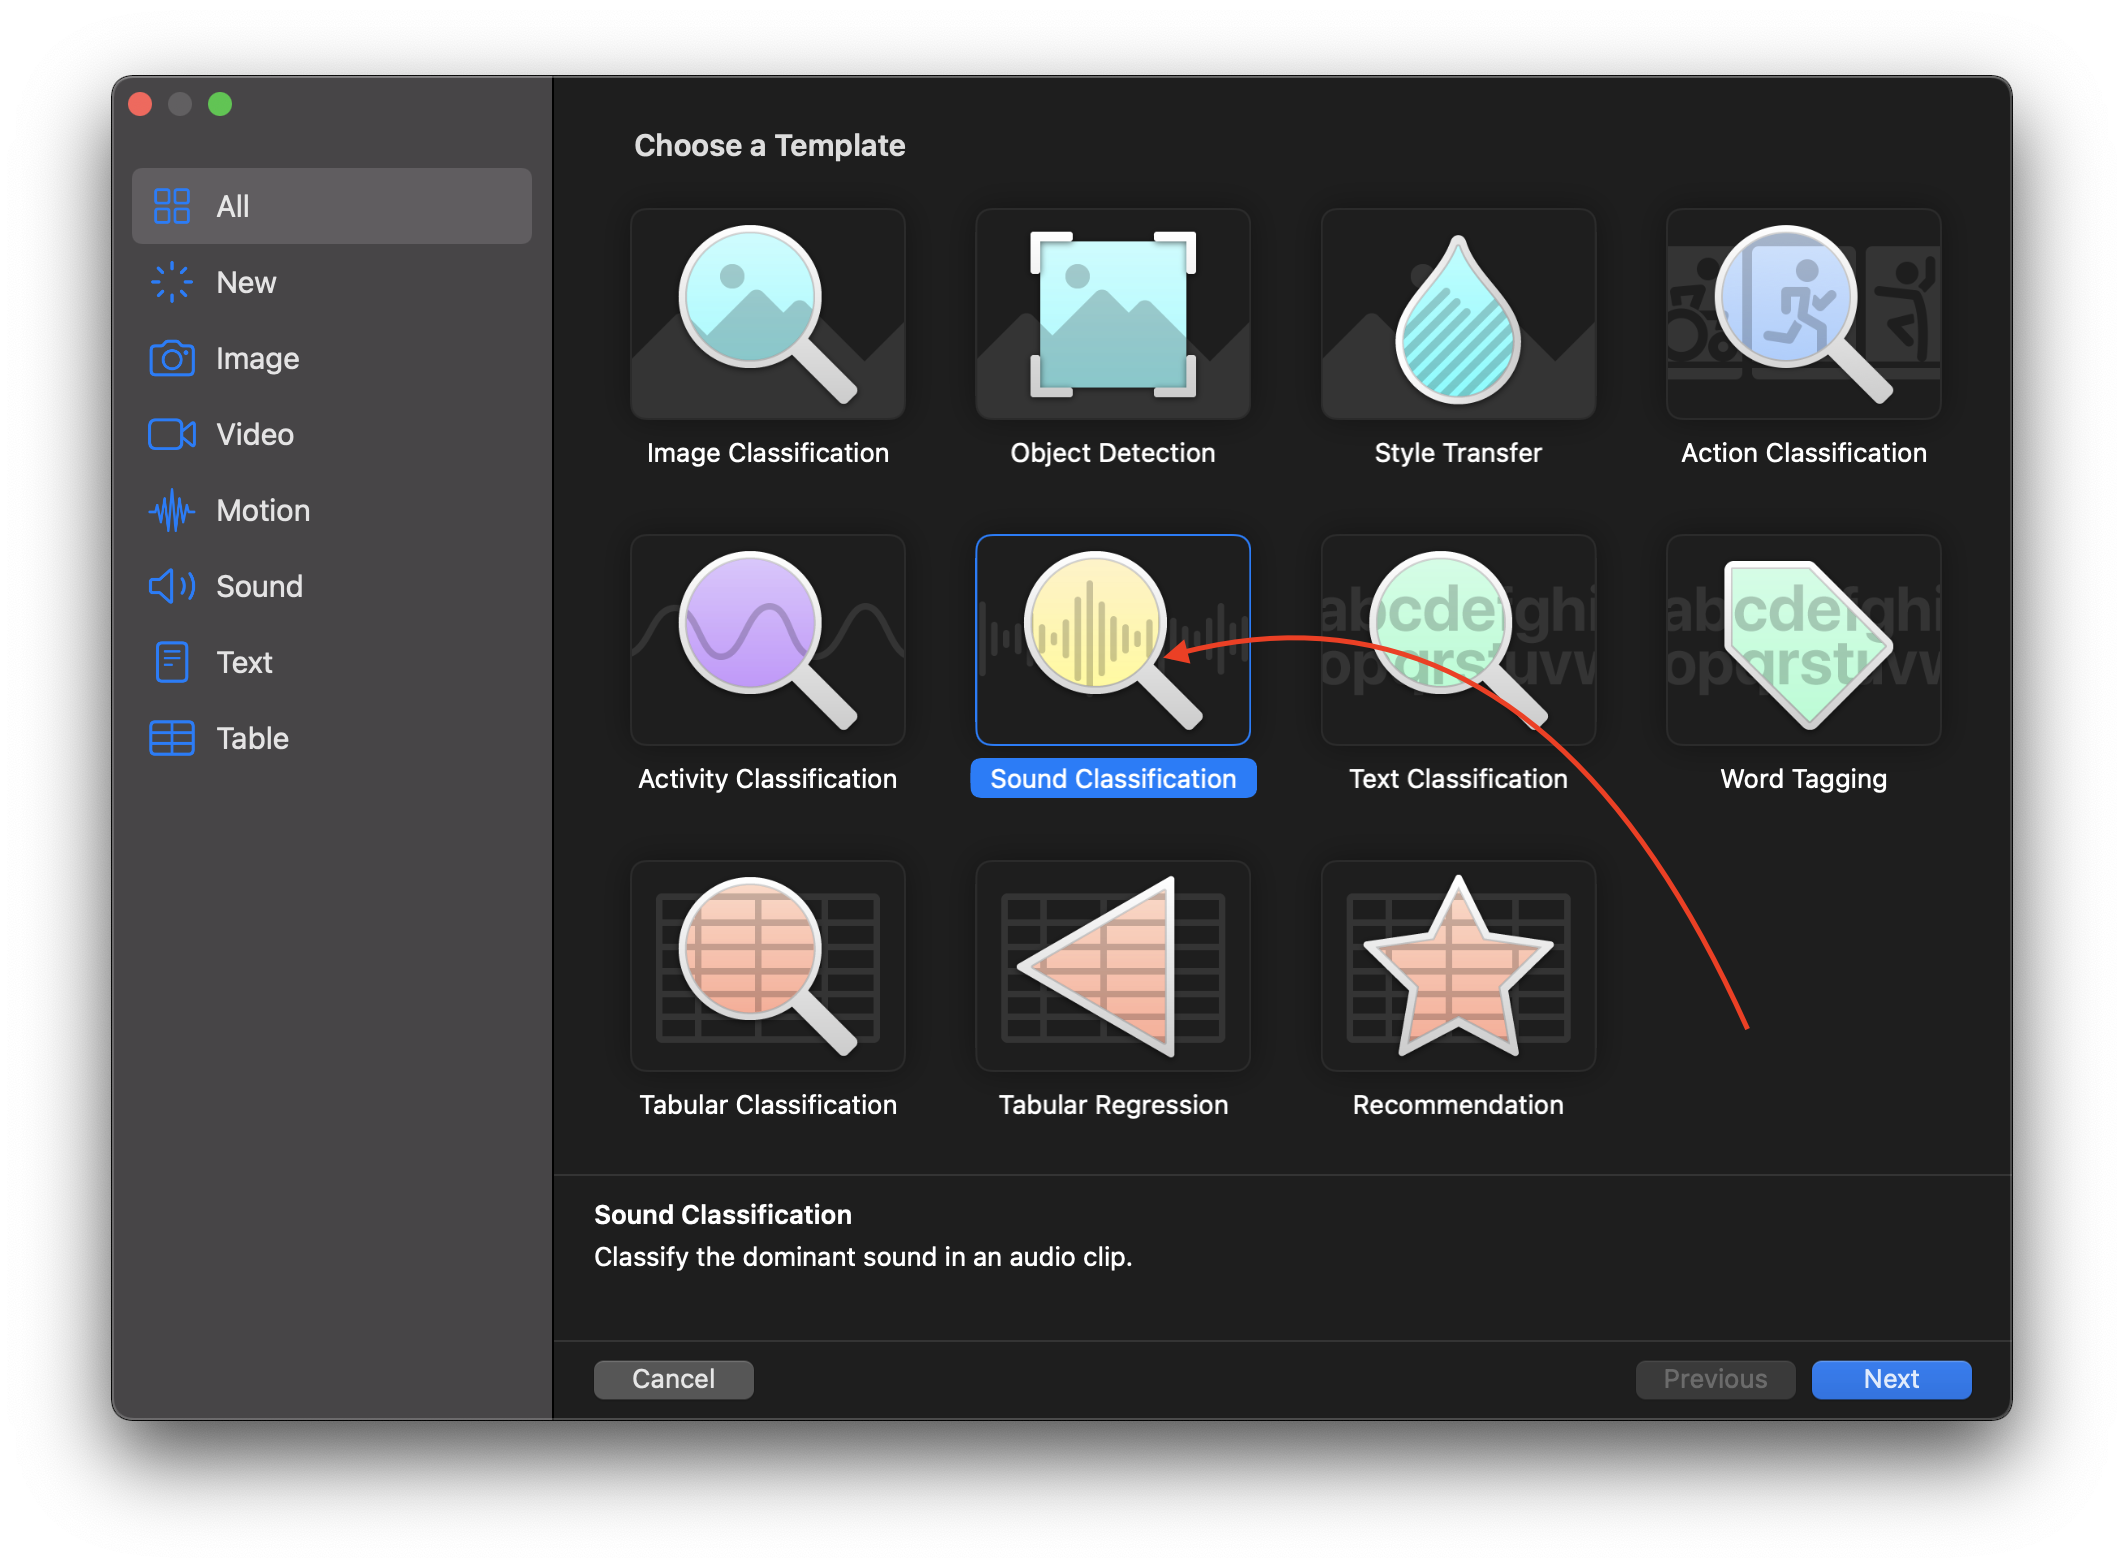
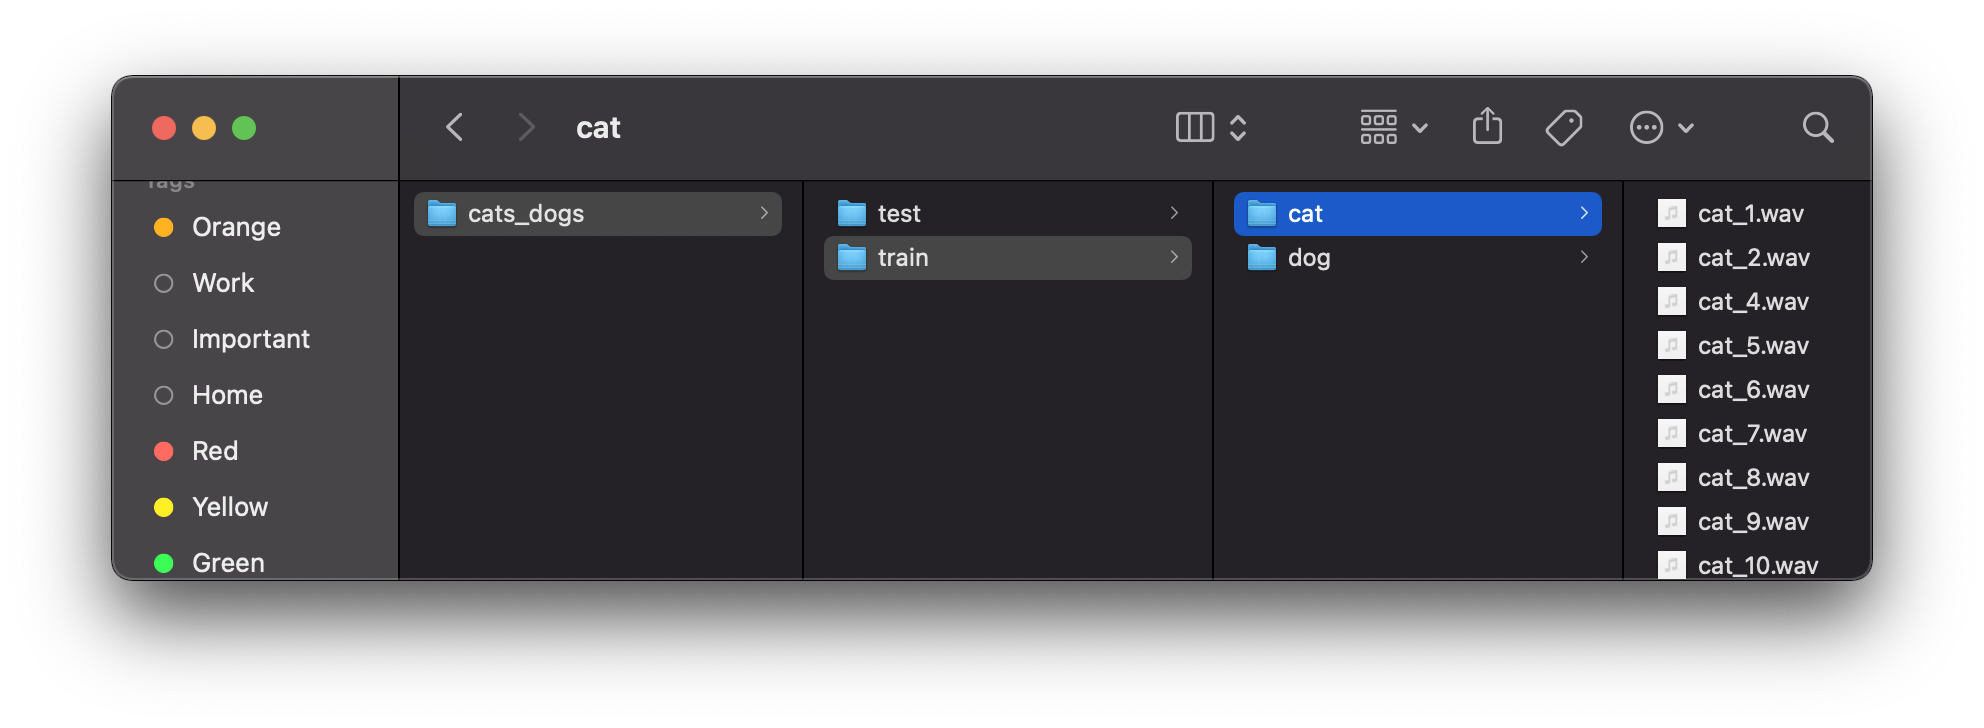
We are interested in the Sound Classification template, so let’s choose this one. After entering all the needed project information, the project window with fields for selecting training and validation data appears. Training data, in our case sound samples, must be separated into different folders for each category, like so:
The last step before starting the training is selecting the datasets in the Create ML application. Automatic option can be selected for validation data. However, this is very important that validation data is selected - it prevents a common problem in Machine Learning known as overfitting. You can read more about overfitting and what it is in wikipedia.
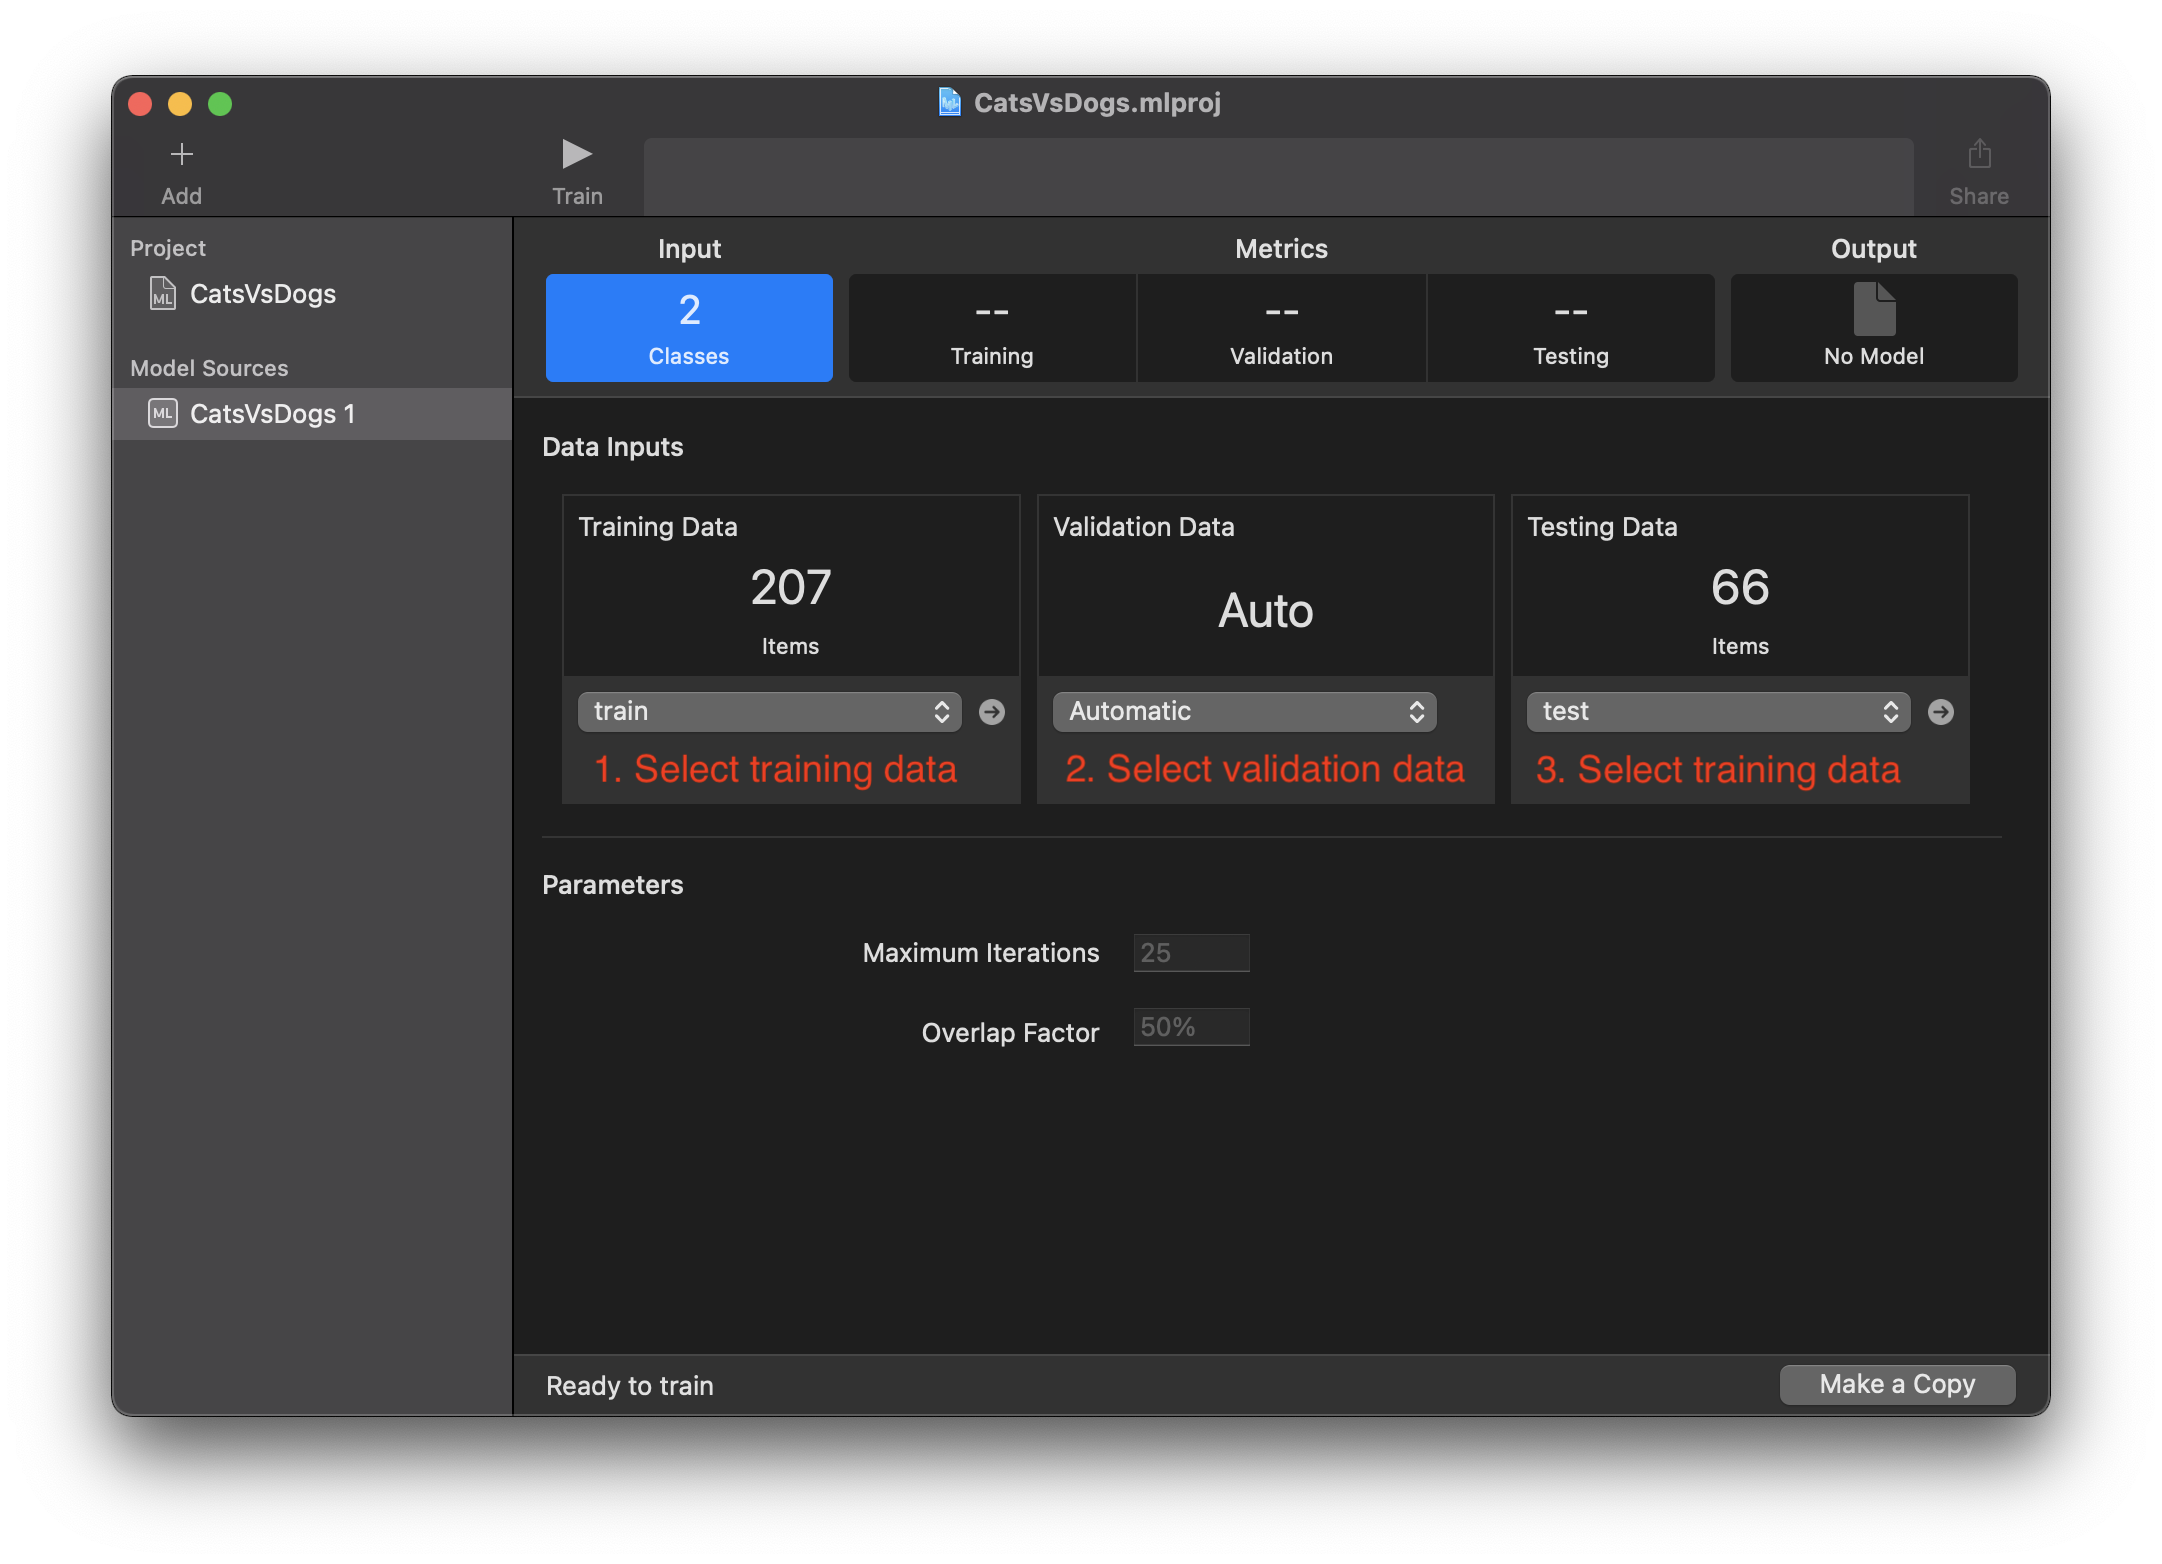
After selecting training, validation, and test data, press the Run button and prepare some ☕️. I’m kidding, with this amount of data and M1 processor, you probably won’t even have time to stand up before training finishes. Information about the training progress and model’s accuracy appears in different tabs of the Create ML application. Create ML application even allows to test the model manually by selecting sound files. We are mostly interested in the output - the sound classifier model.
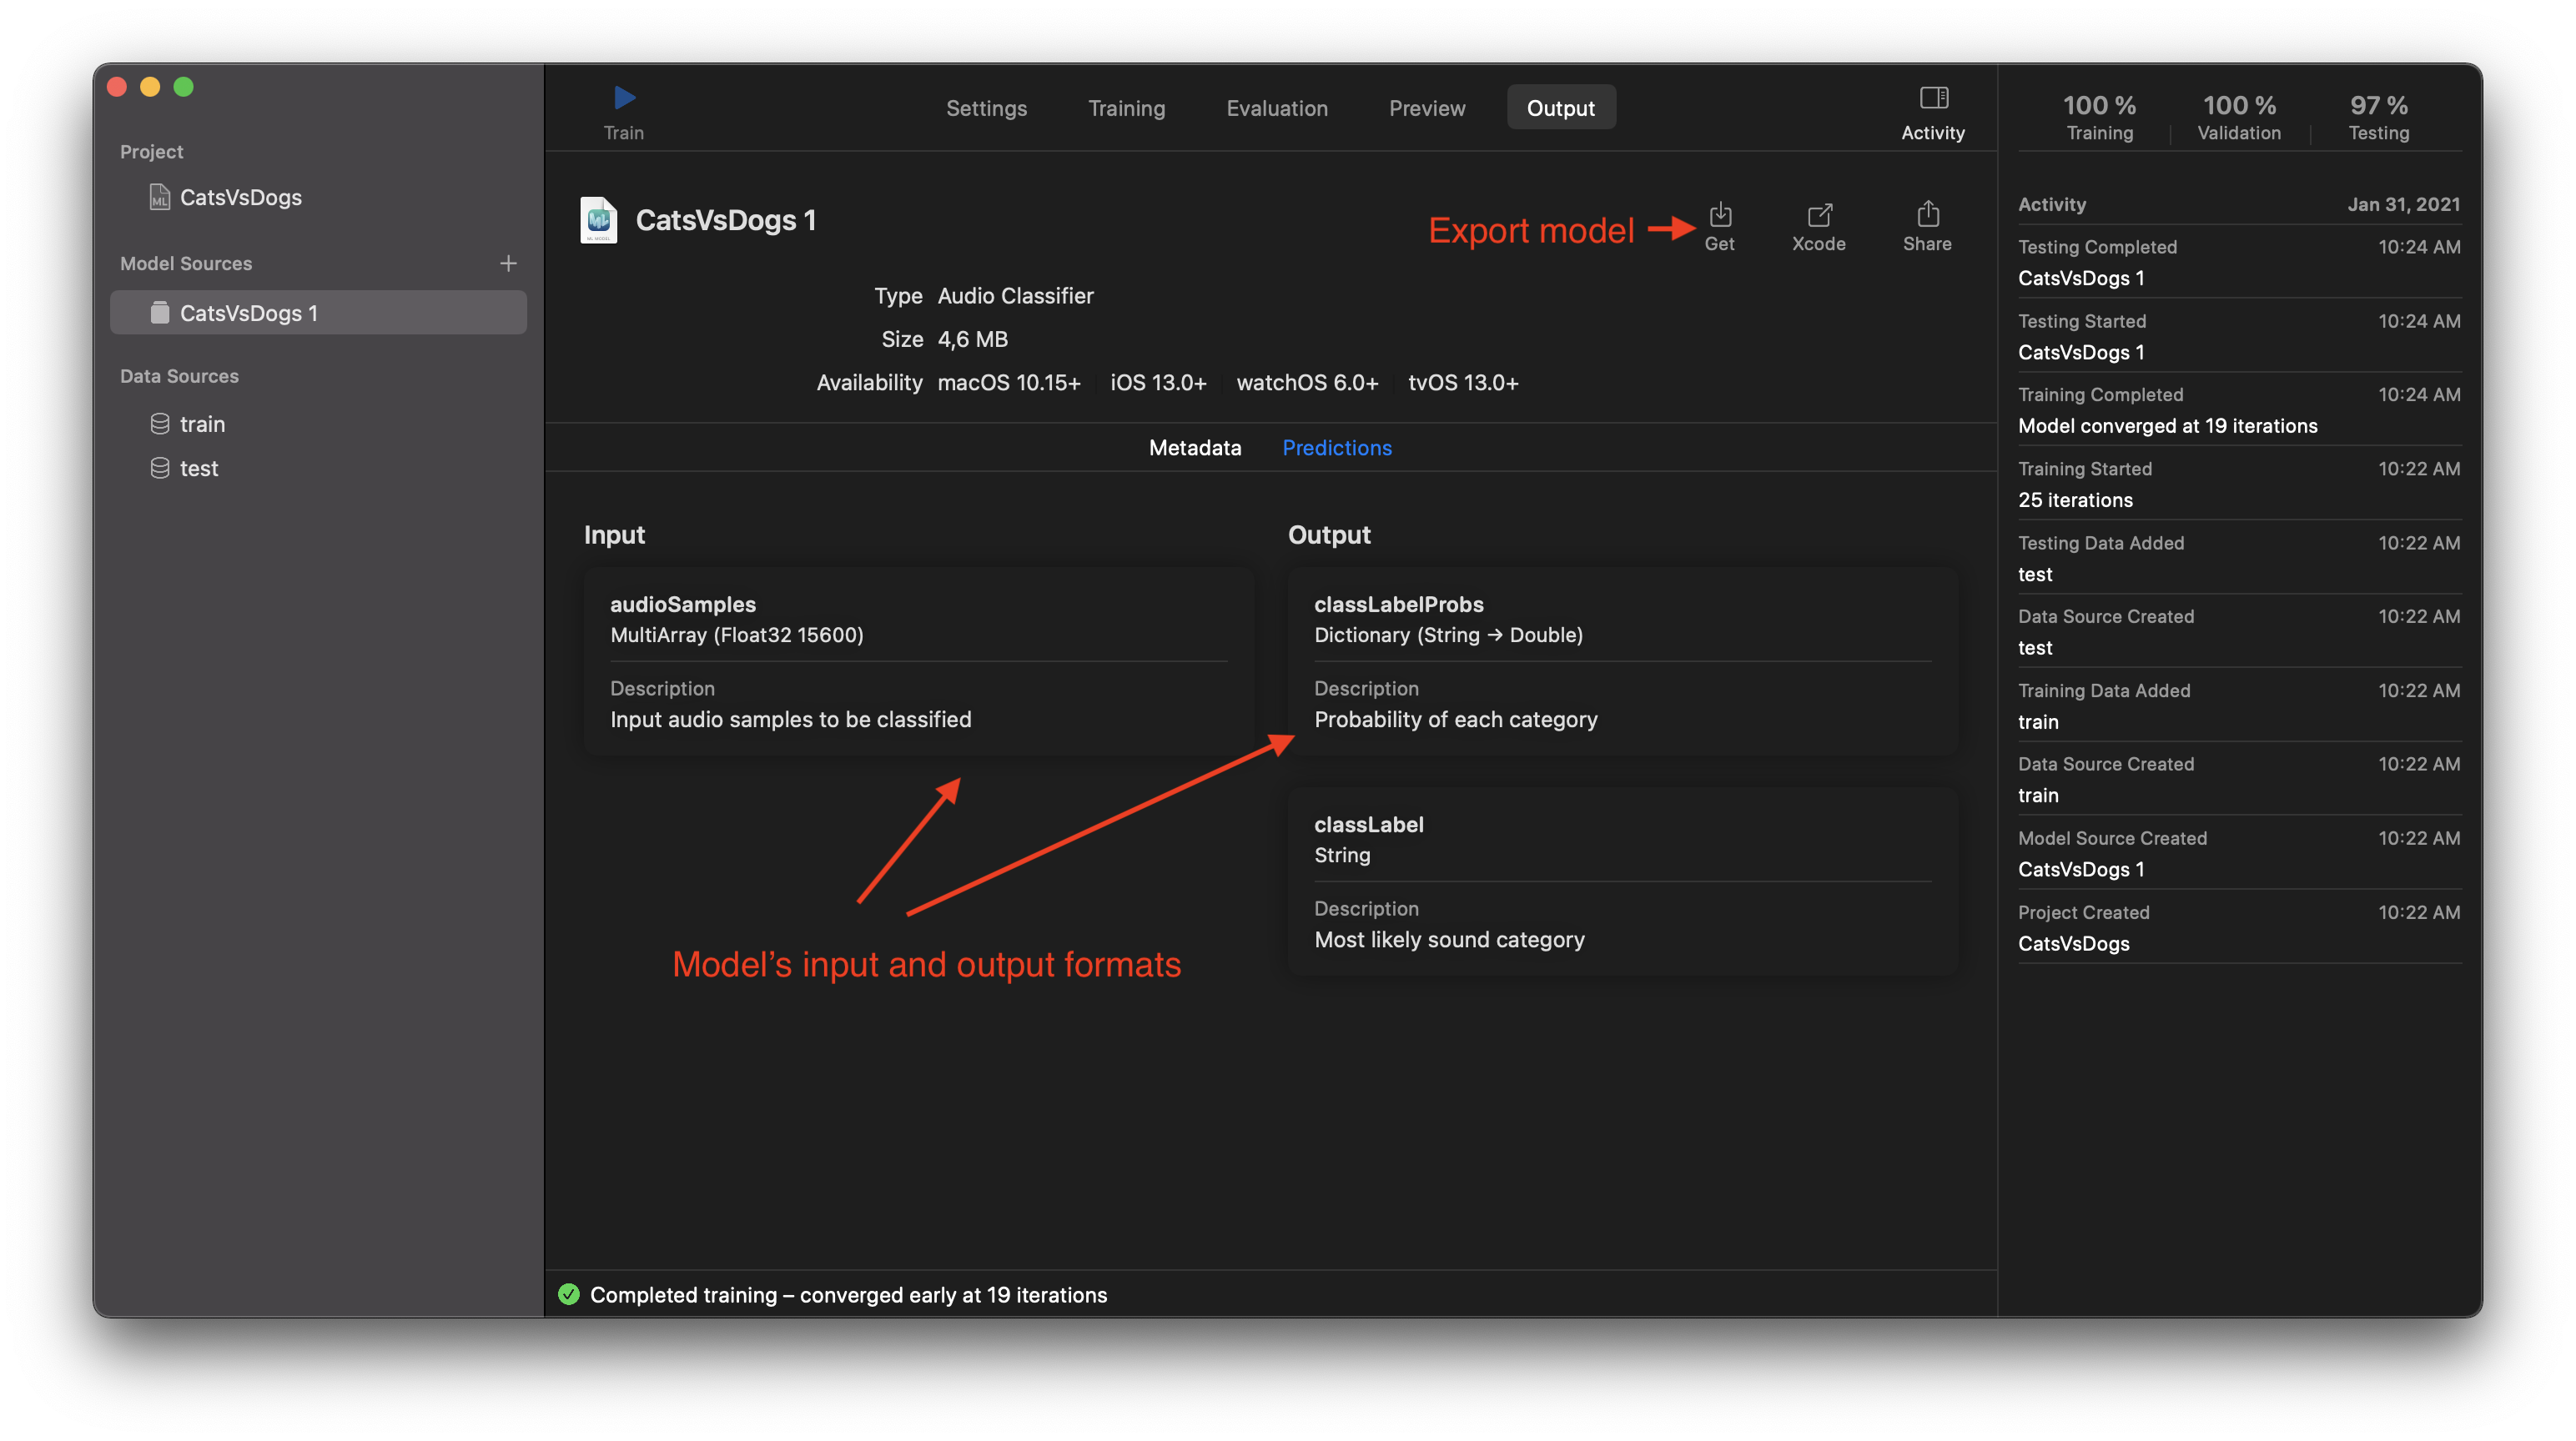
That’s it - the Machine Learning model for classifying sounds of barking and meowing is ready for use.
Training Machine Learning Sound Classifier model with Turi Create
It is common for iOS developers to lock in using technologies provided by Apple for iOS development, like Objective-C, Swift, and Xcode. Here we leave the comfort zone - we are going to play with the Python language a bit ⚠️. Yes, Turi Create is a Python package! But don’t get scared, Turi Create provides a great user guide and documentation and is quite easy to use. Let’s see it yourself in the Google Colab Notebook where all the code for training the sound classifier is. For those who don’t know what is Google Colab here is the official explanation:
Colaboratory, or “Colab” for short, allows you to write and execute Python language in your browser, with:
- Zero configuration required
- Free access to GPUs
- Easy sharing
In short, Google’s Colab provides a way to write code in the browser and use all the needed Google’s GPUs to speed up training models in the cloud for free. If that is not cool, what is?
The whole code for formatting the data and training the model is in the notebook.
The general rule in data science and Machine Learning is that data cleaning and formatting takes much more time than actually creating the model. When data is clean and formatted, only a couple of code lines are required for creating and training the model.
# Create the model.
model = tc.sound_classifier.create(train_data, target='category', feature='audio')

# Generate predictions from the test set.
predictions = model.predict(test_data)

# Evaluate the model's accuracy
metrics = model.evaluate(test_data)
print(metrics)

# Save the model in Turi Create format
model.save('soundClassifier.model')

# Export the model for use in Core ML
model.export_coreml('soundClassifier.mlmodel')
It is one of the simplest examples of what is achievable with Turi Create. The more advanced examples of Turi Create usage are presented in the official documentation.
So, is Python and Turi Create really that scary?
Running Sound Classifier model with Sound Analysis framework
Ok, let’s run the sound classifier Machine Learning model and see how it works in Xcode Playgrounds. It doesn’t matter which model we take - either one from Create ML or Turi Create should work the same way.
All the code for running the model in the Xcode Playgrounds can be found here. However, the essence of getting the result from the model is super simple.
class SoundClassifierObserver: NSObject {
    func analyzeSoundSample(at url: URL) {
        // 1. Initialize Sound Analyzer, model and request
        guard let fileAnalyzer = try? SNAudioFileAnalyzer(url: url),
              let model = try? CatsVsDogs(configuration: MLModelConfiguration()).model,
              let request = try? SNClassifySoundRequest(mlModel: model) else { return }

        // 2. Add request and analyze the sound sample
        try? fileAnalyzer.add(request, withObserver: self)
        fileAnalyzer.analyze()
    }
}
-
First we want to initialize three properties: the Sound Analyzer, the model that we trained previously, and the classification request.
-
After adding the request to the analyzer, we can start the sound analysis. In this example, a
func analyze()method was called, which executes synchronously. It is worth noting that the task might run for a long time and block UI. There is another method that runs asynchronously,func analyze(completionHandler: @escaping (Bool) -> Void), consider using it.
In one of the lines, a reference to self passed as an observer. self will observe the analysis results. It must conform to the protocol SNResultsObserving.
extension SoundClassifierObserver: SNResultsObserving {
    func requestDidComplete(_ request: SNRequest) {
        print("Request: \(request.description) completed.")
    }

    func request(_ request: SNRequest, didFailWithError error: Error) {
        print("Request: \(request.description) failed with error \(error.localizedDescription).")
    }

    func request(_ request: SNRequest, didProduce result: SNResult) {
        guard let result = result as? SNClassificationResult else { return }
        result.classifications
            .filter { $0.confidence > 0.85 }
            .forEach {
                print("Class: \($0.identifier) Confidence: \($0.confidence * 100)%")
            }
    }
}
Let’s try to run the analysis on one of the sound samples with a cat meowing.
if let testAudioURL = Bundle.main.url(forResource: "cat_152", withExtension: "wav") {
    let observer = SoundClassifierObserver()
    observer.analyzeSoundSample(at: testAudioURL)
}
In this case, the analysis goes successful, a method func request(_ request: SNRequest, didProduce result: SNResult) gets called. The previously trained sound classifier is quite confident that a cat is meowing in this sound sample:
Class: cat Confidence: 99.99999775404376%
Class: cat Confidence: 99.99998888215313%
Class: cat Confidence: 99.99999989513636%
...
There we go, the first Machine Learning model trained by ourselves works like a charm! 🍻 Isn’t that awesome?
Training various types of models with Create ML, using tabular data or images isn’t very different from training sound classifiers. I can’t wait to hear what Machine Learning models you’ll come up with. Share it in the comments or send me a message!


Comments